Following-up with survey respondents by thanking them for their time, maybe with a gift or special offer, is a good way to build favorable relationships. Similarly, alerting relevant people on the commissioning side about any individual rating extremes enables them to take beneficial action. In both cases, speed is essential for positive impact.
Nfield Online users therefore often ask us if there’s an easy way to do this. Is it possible to automatically generate the sending of different emails, so appropriate messages instantly get delivered? Without doing any coding? We’re pleased to say the answer is “yes”!
You just need to set everything up via a simple external application. Let’s show you how.
An instantly smooth experience via a simple solution
Before we start, try our demo to experience how it works from the email recipient point-of-view. This example asks you to complete a one-question survey and then enter your email address. After you submit the survey, you’ll receive a thank-you email.
How easy was that?! Of course, if your survey is based on a pre-existing sample, the respondent will not need to enter their email address, as it will already be known.
There are a number of different ways to automatically generate these emails. We’re going to show you how to do it via an online platform called Zapier.
For those of you who are interested in the technicalities, this method uses an external API call in ODIN script. It’s a process which passes certain variables to an external web hook (a web address that receives data), and then sends an email.

So your first job is to build a webhook. Let’s go!
Build your webhook
Before building your webhook, you might like to understand what a webhook is and how it works.
A webhook is a URL which is called from your server, when the conditions you have set to execute an instruction are met. The webhook then instructs the next application in your workflow to do its stuff. The webhook thereby acts as a connector between different systems to automate workflow. For our purposes, when your email triggering conditions are met, the Nfield Online server will call the webhook, which then instructs your email client to send the relevant communication.
Here’s how to set up your webhook via Zapier:
1) Create a new Zap and select “Webhooks by Zapier” as your Trigger App.

2) Select “Catch Hook” as the function
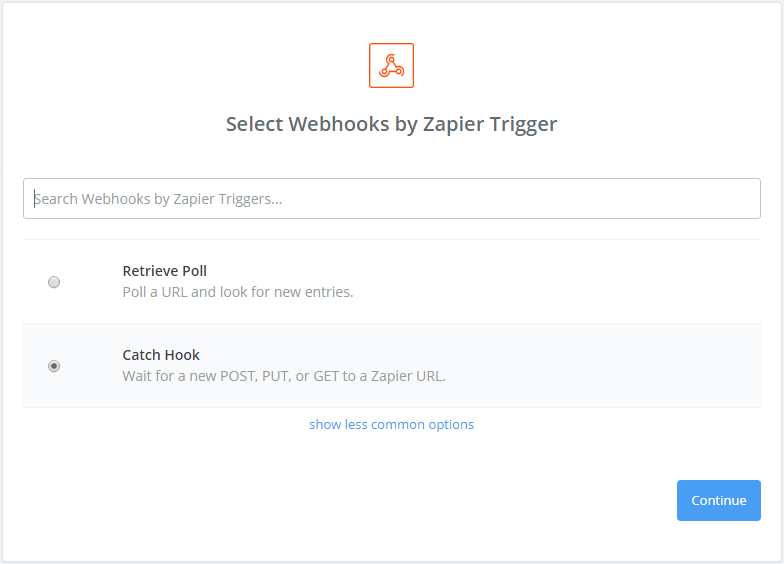
3) Save the URL provided. This will be your webhook to be called from Nfield.

4) Let the Zap know what information you are going to pass to it by setting the parameters. For example, these are likely to be Email, RespondentKey, Score and Name. Pay attention to the symbols which connect them. The first one has to be a question mark, then ampersands. Take a look at this example by opening it in your browser.
{URL copied}?email=xxx@nipo.com&respondentkey=12345&score=5&name=Doris
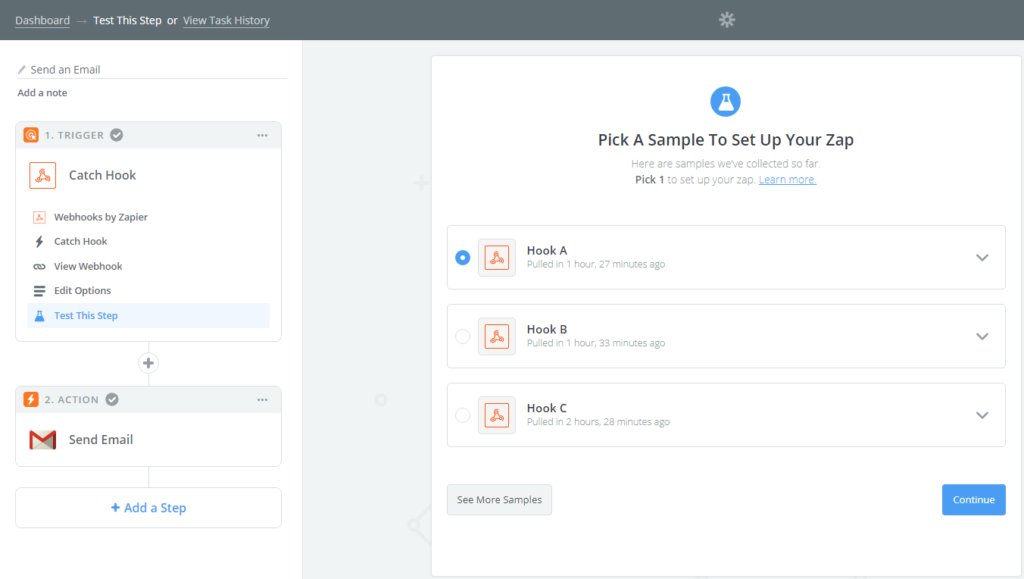
5) Test your Zap. Click “See more samples”. It will grab test results, which you can expand to check if they’re delivering the results you expect. If all is working as expected, select it and continue.

That’s it! Your webhook is ready.
Sending email
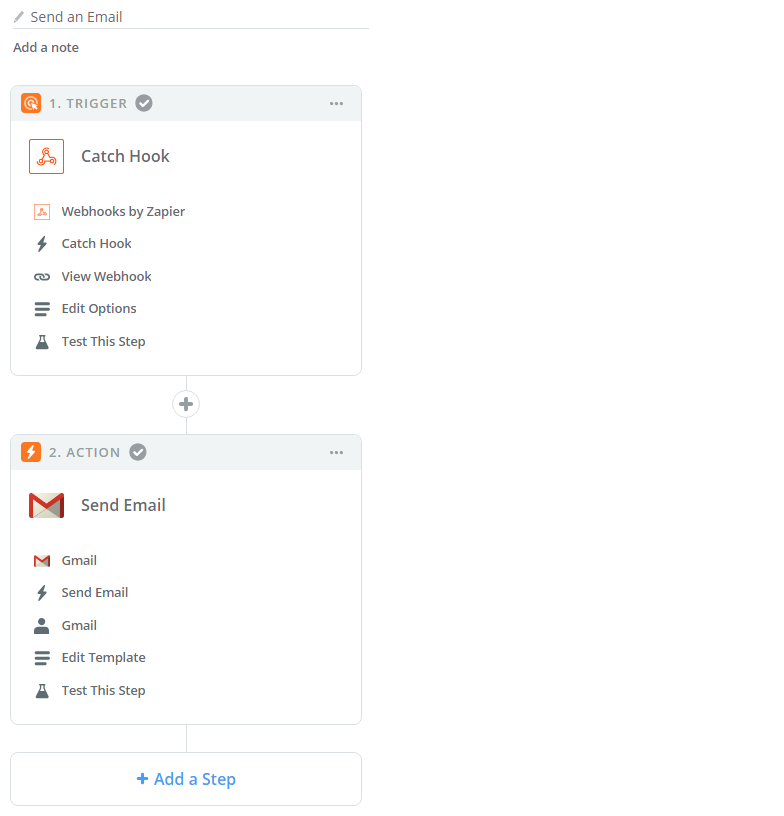
The next thing you need to do is connect the webhook to your email client. We’ll use Gmail for this example. You also do this in Zapier, using the Gmail Zap.
1) When setting up the email Zap, you can insert the parameters passed via the webhook into the various email fields (To, Subject and Body). Take care to compose and format your message nicely. Note that HTML is supported in the Body field.

This is how it will look in your Zap.
Add an external API call in Nfield
In Nfield Online, you’ll need to add an “API Endpoints” (APIS) entry. Don’t let this technical term scare you! We’ve made it all really easy.
1) In default settings, go to APIS tab. Add a new Endpoint. Give it a name and enter the webhook URL you were given by Zapier. Add a description and save.
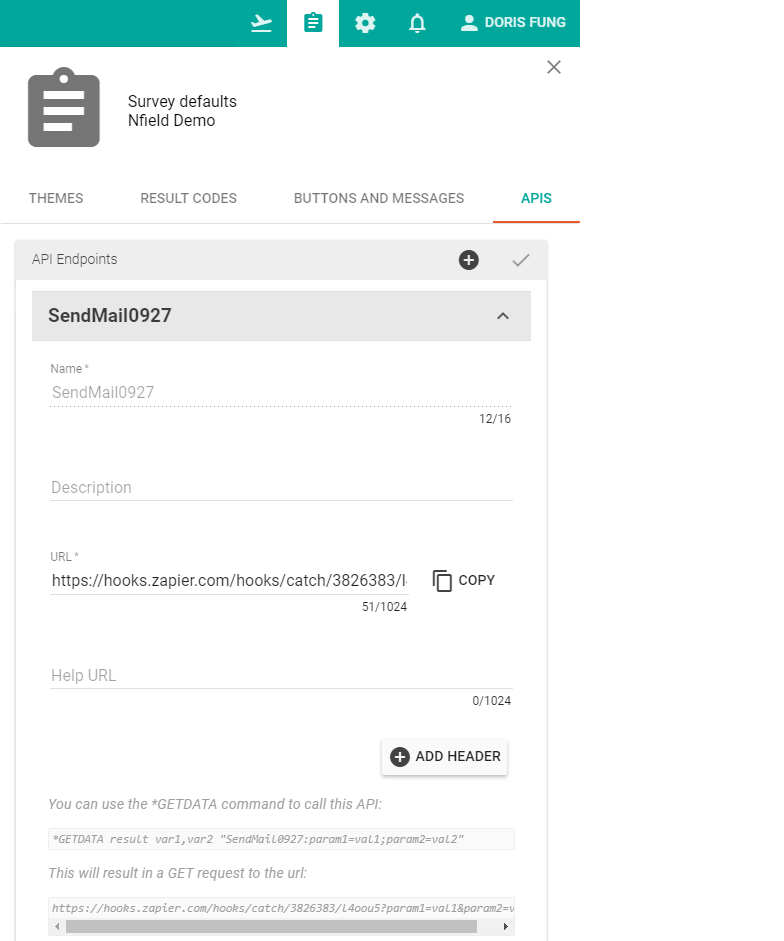
2) In the ODIN Script, we have the following to trigger this API call. Please download the complete script with this link.
*GETDATA result pair,ask "SendMail0927:email=*? Email;respondentkey=*? RespondentKey;score=*? Score;name=*? Name"
Now you can get a live link and try it out. Good luck!
Contact us
Contact us to find out more about automating work processes using Nfield. Similarly do share your own examples that may benefit other Nfield users!
