There are probably many occasions when you want to follow through after a customer interaction by sending them a survey. But even though their details are all neatly logged in your CRM, getting the invitation out takes a lot of effort.
First you’ll need to export the data from your CRM and import it into your data collection system. With a few more clicks, you’ll finally manage to send the email. It’s a manual process which is too laborious to be done in real-time, so ends up happening in daily or even weekly batches. Which means you lose the benefit of acting immediately.
Wouldn’t it be better if all this was automated? So your survey invitation email gets sent at the very moment your CRM is updated with the latest status. No waiting. No time-consuming clicks.
The good news is you can make this happen. The even better news is you won’t have to write a single line of code! Zero programming knowledge required.
Integration without coding
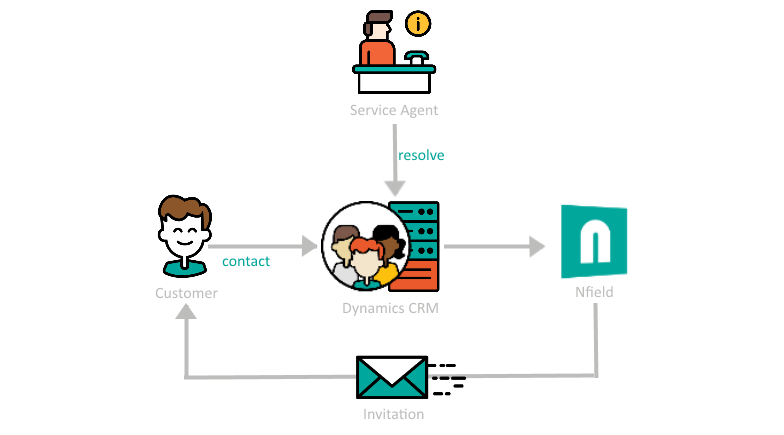
It all comes down to integrating your CRM with Nfield. When this is done, updating a customer case record triggers your CRM to send the relevant information to Nfield, from where the instruction to send an appropriate survey invitation is automatically issued.
So how do you achieve this integration? You’ll need a good tool, a bit of curiosity and a clear mind. Maybe some coffee too?
The following guide shows you how to integrate Microsoft Dynamics CRM with Nfield. If you have a different CRM, you will need a different method. That shouldn’t be a problem – just contact us to ask how!

Flow
To keep things really simple, we’re using Microsoft Flow. This has a large set of components (known as Connectors) which you use to connect systems together, e.g. your CRM + Nfield. Each connector allows you to set triggers, which alert the relevant connected system when changes occur for which you want actions to be taken. The functionality is pretty powerful. And what’s more, it’s FREE!!
Dynamics CRM Connector
Let’s look at an example of a Dynamics CRM Connector which has 3 triggers and 5 actions.
Trigger – this monitors your CRM for specified events, such as when a record is created/deleted/updated. You just have to associate these with the way you use your CRM. For example, when a new customer is added, you know a new record gets created. So if you want the adding of a new customer to trigger an action (see below), you select “When a record is created” to be the CRM trigger. Or in the scenario of a customer case being resolved, you’d select “When a record is updated” to be the trigger. In this instance, the instruction will also need to be modified with an IF condition to limit the trigger to resolved cases only.
Action – this is a change to be made in the Dynamics CRM, such as create/delete/update/filter/retrieve one or more records.
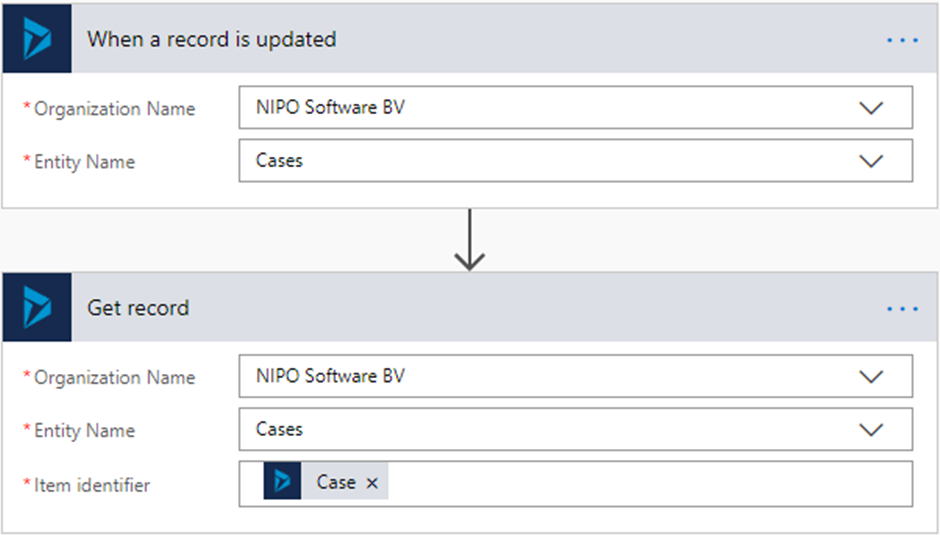
In the following example, we’re using the scenario of a customer case being resolved.
The flow begins with setting a trigger to look for case entities which have been updated. This sets off an action to read specific details of any relevant entities. These details (email address, name, reasons for contact…etc) can be used further on in the Flow.

HTTP Connector to reach Nfield
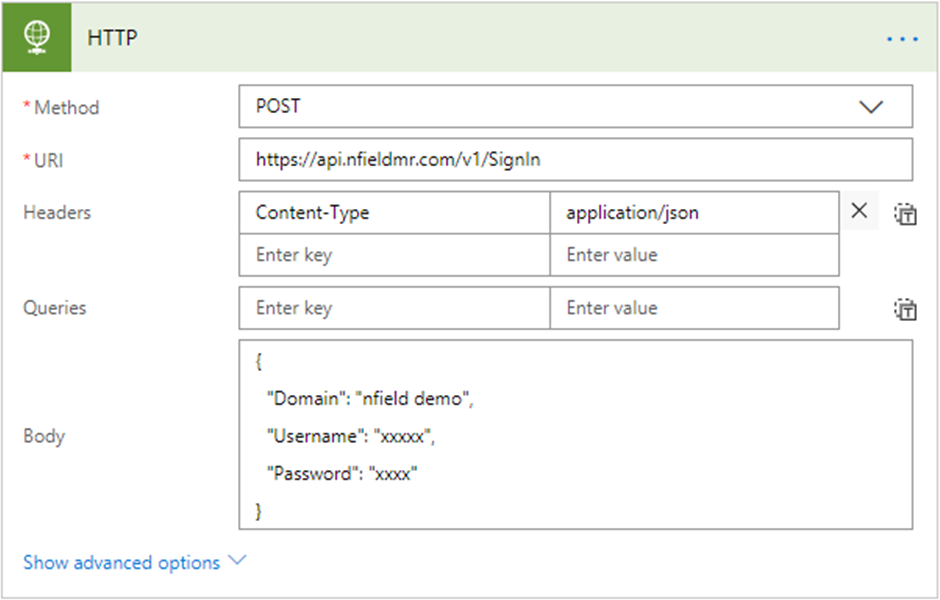
Now you need to make the connection with Nfield. You won’t find an Nfield Connector listed in Microsoft Flow, but Nfield has an API which can be reached by setting up an HTTP connector. HTTP will be offered as an action.
The first step is to log into Nfield by filling in a form, as shown on the screen below. The formats and values you need to enter are all described in Nfield API documentation.

Once this is done, you can then continue to add more steps. In this scenario, we have added respondent data and created an email batch to send an email. As a bonus, we’re also triggering an SMS which will be sent using TextMagic.

